Shopify is a premier e-commerce platform that makes it simple for businesses to establish and manage their online store. Its user-friendly design and customisable features offer a smooth and efficient experience for both merchants and customers.
Floating bars offer customers a fast and convenient way to access the information they need. With their ability to provide immediate answers to common questions, floating bars can reduce response times and enhance the overall customer experience.
They can also handle repetitive tasks, freeing up your time to address more complex customer issues. Floating bars can gather valuable customer data, which can then be used to personalise the customer experience and improve your marketing strategies.
But there are heaps of other floating bar companies on the market. Why use Serviceform?
Why you should use the Serviceform Floating bar for your Shopify account
- No coding knowledge is necessary to create a Serviceform Floating bar.
- Customise easily to fit your brand with Serviceform Floating bars' high level of customisation.
- Enjoy built-in real-time website and tool analytics at no extra cost with Serviceform.
- Experience high engagement rates on your website with the use of Serviceform Floating bars, as seen with satisfied customers.
- Enhance your website presence by displaying discounts, coupons, seasonal promotions, and other offers in prominent areas of your website.
- Encourage important actions from B2B website visitors, such as newsletter subscriptions, webinar signups, white-paper downloads, and more.
- Easily communicate company news and guide visitors to learn more.
- Take advantage of Serviceform's extensive library of over 500 free, tested templates for inspiration.
Creating a Shopify floating bar with Serviceform is simple and easy. Let's take a look at how to build a smart floating bar for your Shopify site using Serviceform's builder.
Step 1. Create your Serviceform pixel
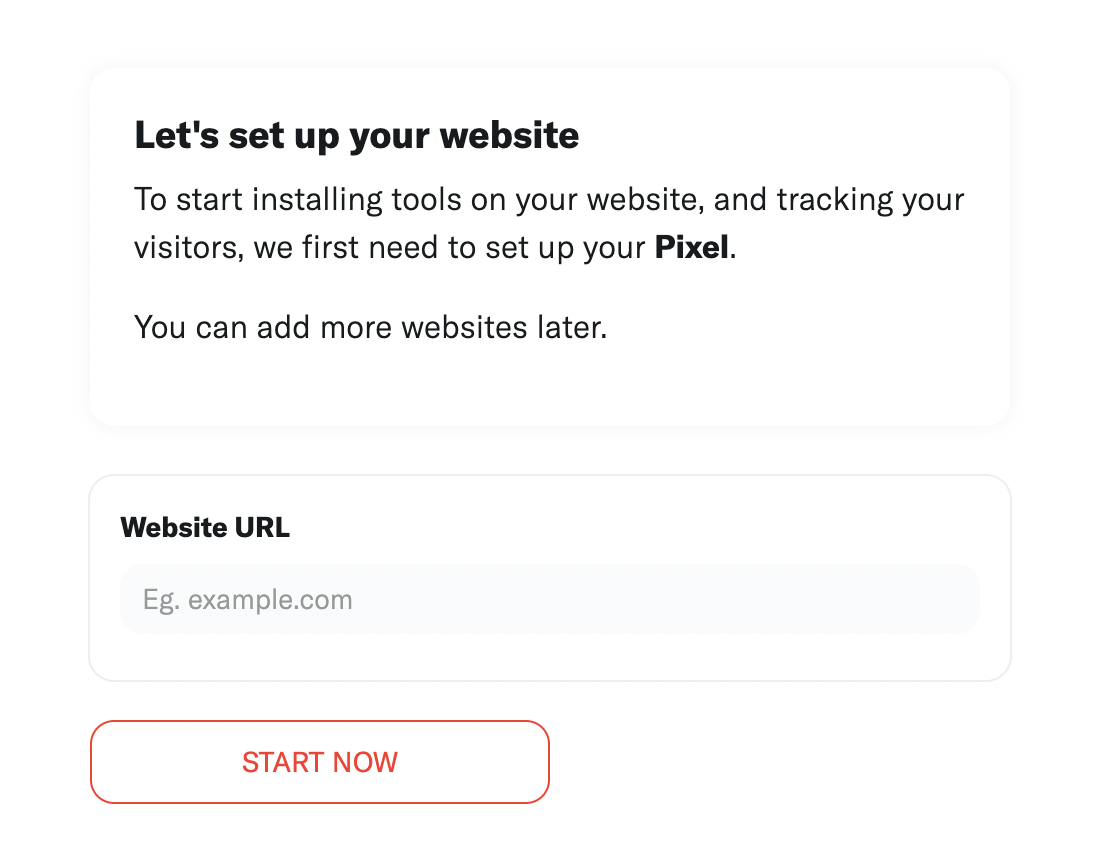
After you create your Serviceform account, you can generate your Serviceform pixel in the box below. To start, type your website URL and select "START NOW".
Step 2. How to install a free floating bar on Shopify
Using HTML
If you're a tech-savvy person or have a developer in your team, it's easy to add a Serviceform Floating bar to your Shopify website using HTML.
To start, click on the website you’ve set up on your Serviceform account and select settings.
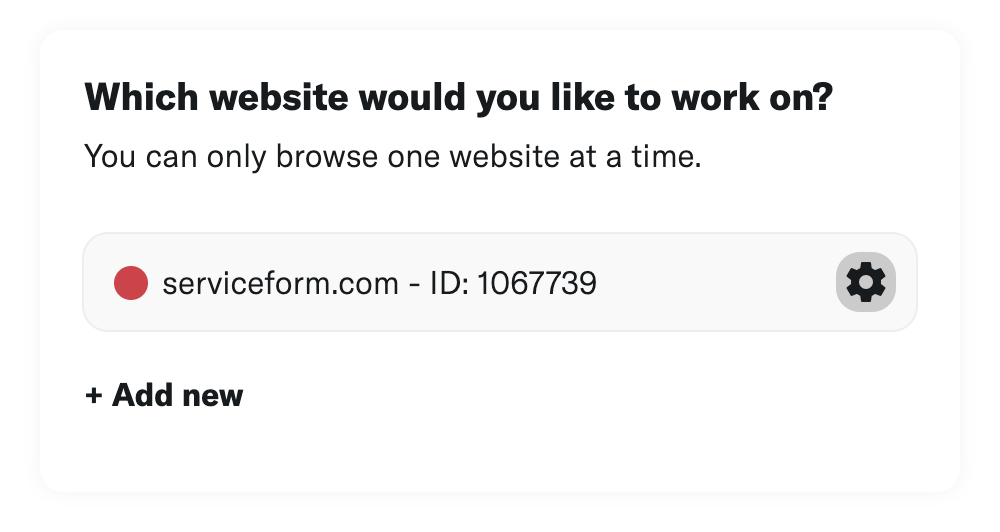
Then, copy the pixel code.

Log in to your Shopify store's admin panel and go to the themes page which is under the online store. Find the theme you want to add the pixel code to and click on "Actions" then select "Edit code".

In the "Layout" folder, click on "theme.liquid". Find the <head> section in the code and paste the pixel code immediately after the opening <head> tag.

Simply add the pixel code that you’ve copied, in the head tag section and hit "Save changes”.
Voila! Your Shopify account just got a lot cooler with Serviceform’s Floating bar.
Using Google Tag Manager
No worries if HTML isn't your thing. Installing the Serviceform pixel into your Shopify website using Google Tag Manager is easy.
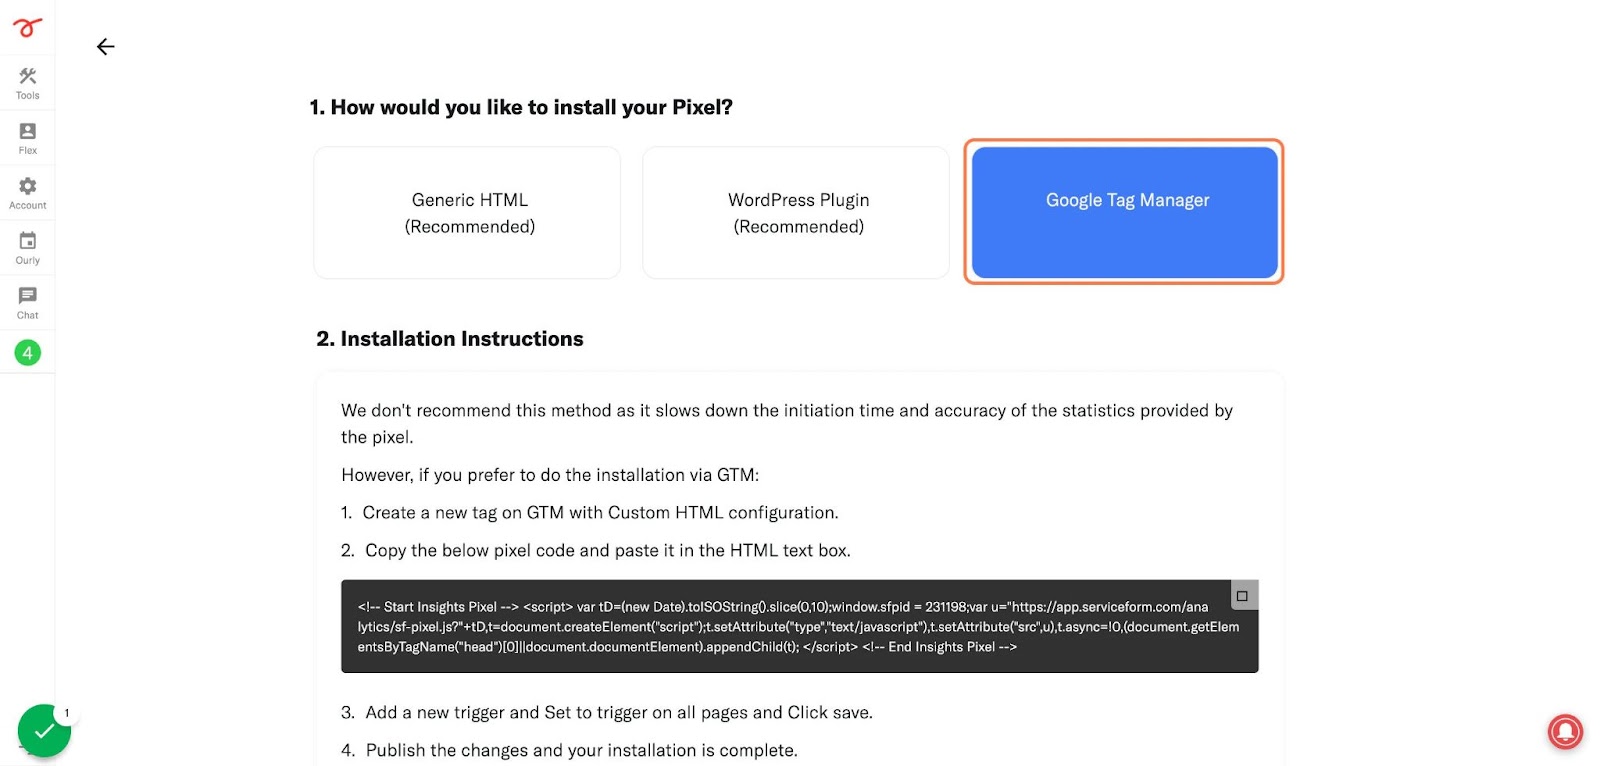
Simply choose the option to install via Google Tag Manager in your Serviceform account, then copy your unique pixel code.
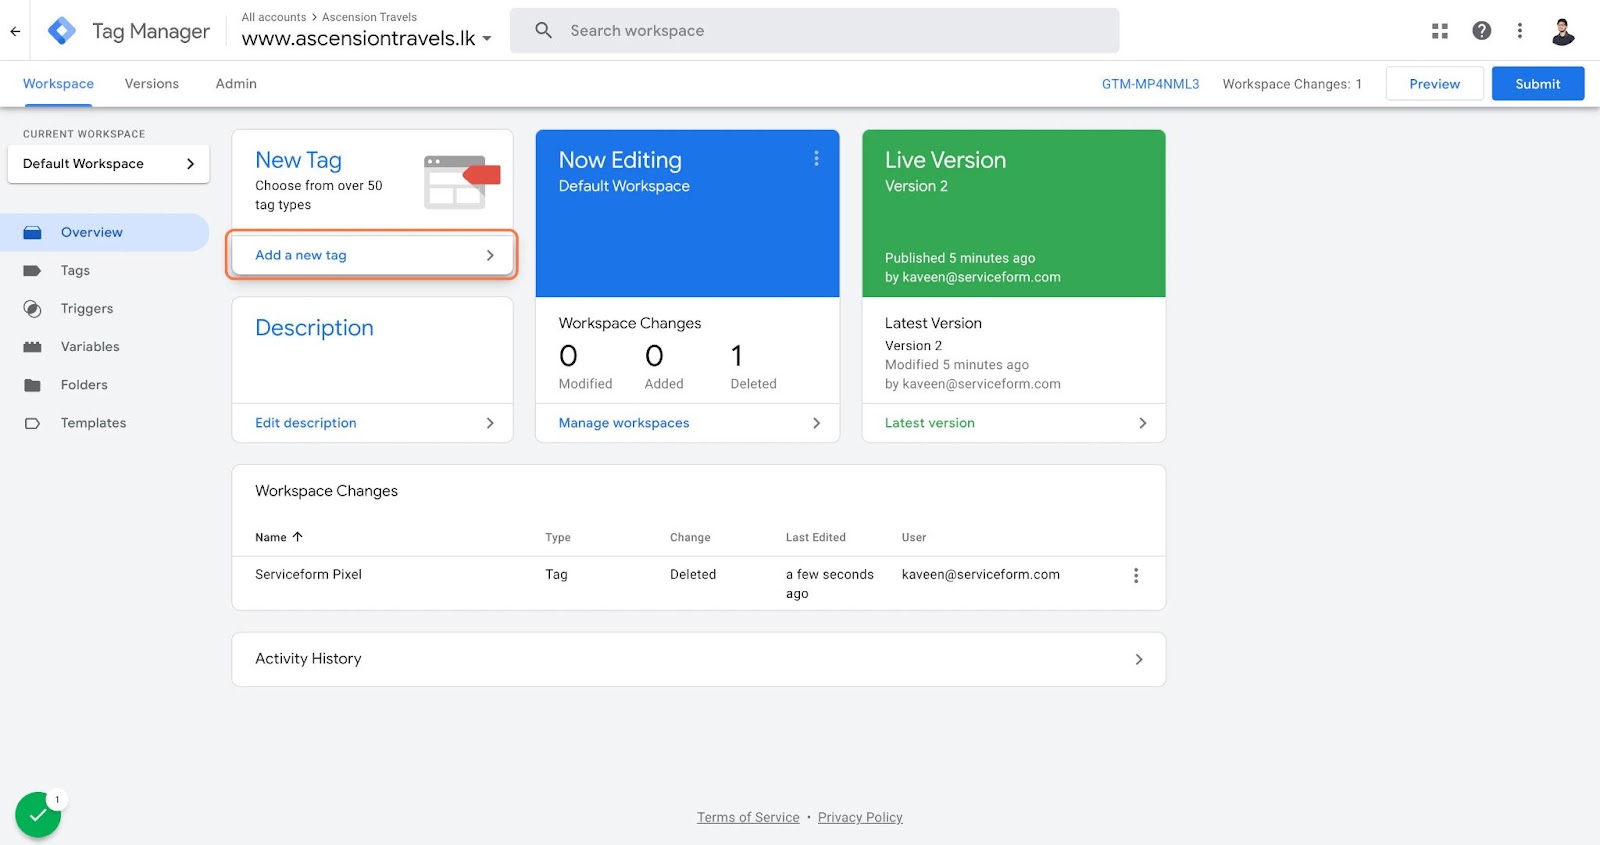
Next, head over to your Google Tag Manager account and create a new tag. Then name your tag.
Once you've named your tag, head to the tag configuration and choose custom HTML from the drop-down menu. Then, simply paste the Serviceform pixel code you copied earlier into the code area.
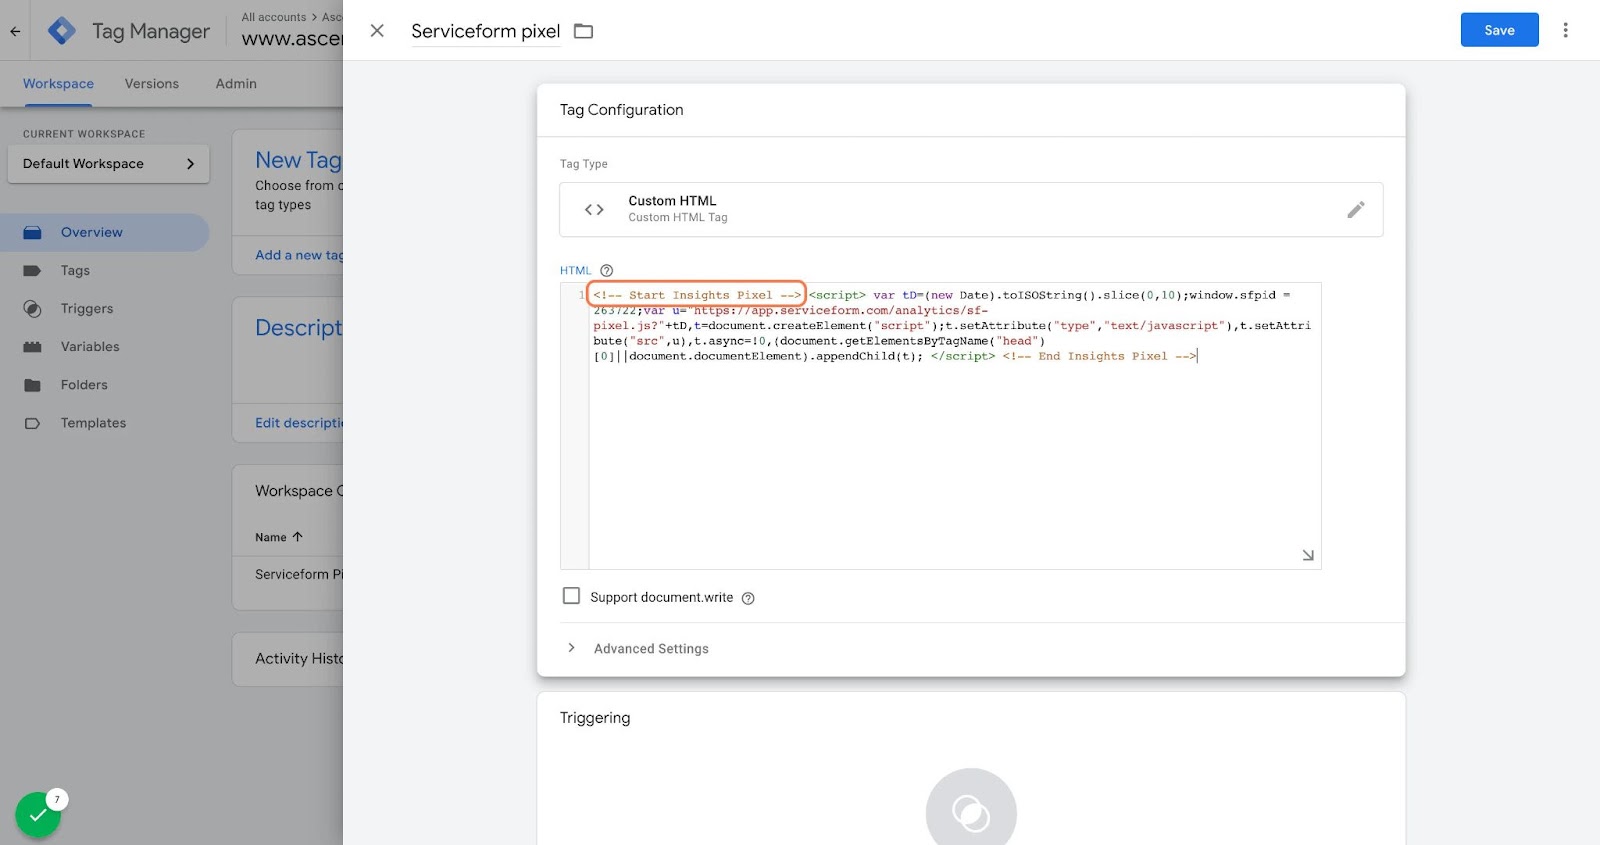
Then click on ‘triggering’ and select ‘all pages.’ Then save your work and press submit. In the submission configuration screen, type ‘Adding Serviceform pixel’ into the ‘Version name’ area, and you’re all set.
Step 3. Test if your Serviceform pixel is live
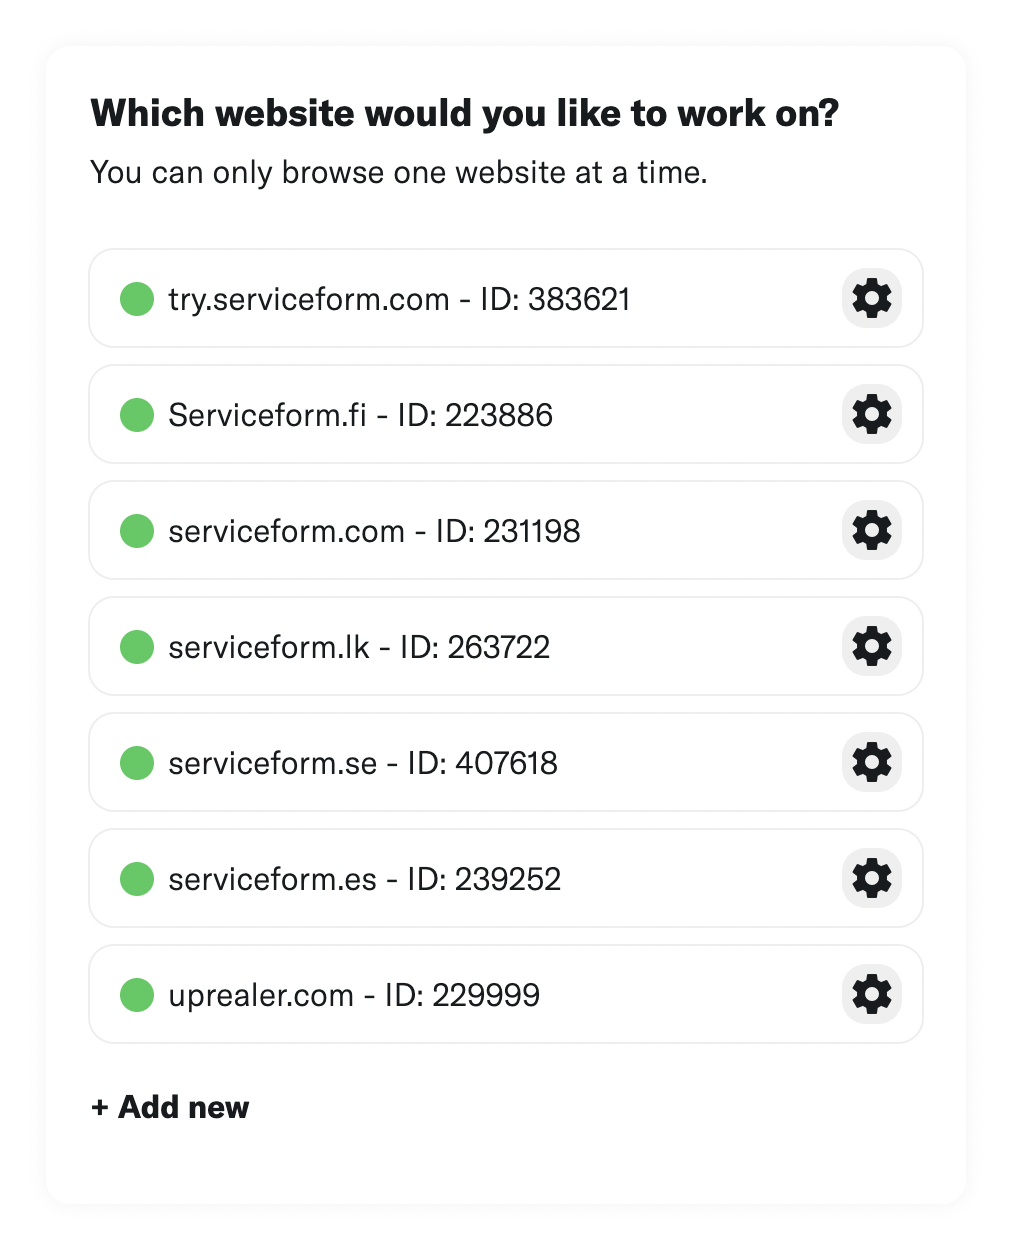
You can check if your pixel is active by looking at the top right corner of your dashboard.
If you see a green circle, that means it's active and ready to go. But if you see a red circle, it means it's not active yet. No worries, just give it a quick check and get it up and running in no time.


.png)


.png)


